
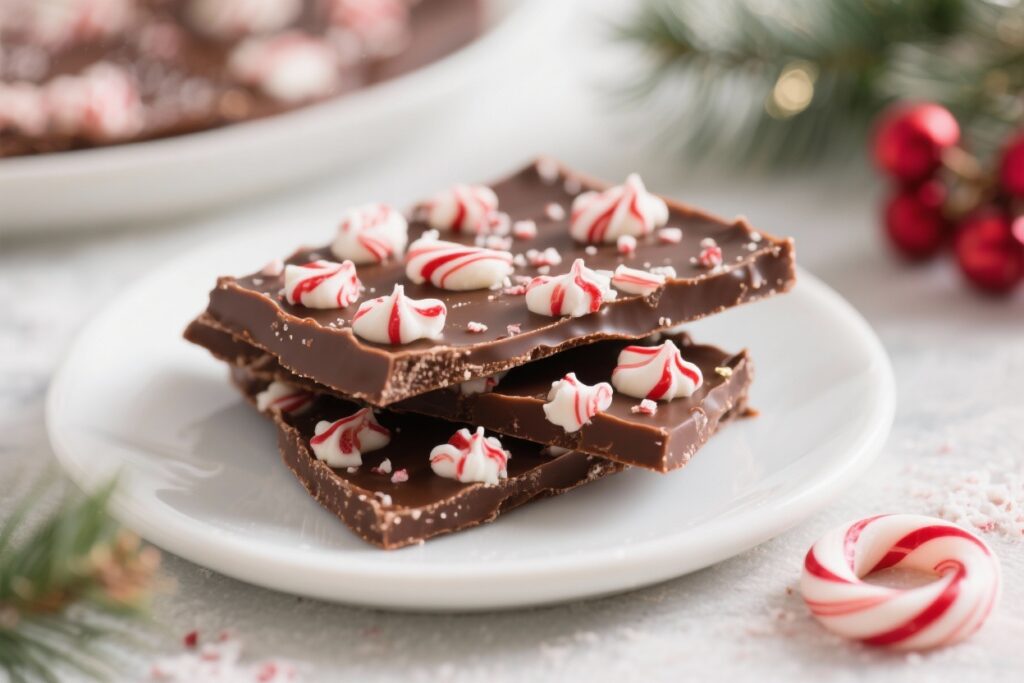
Picture this: glittering trays, twinkling lights, and a candy that snaps like Christmas cheer itself. Peppermint bark is the billionaire of holiday treats—cheap to make, universally loved, and obnoxiously photogenic. No oven, no stress, no weird techniques.
Just simple layers of chocolate that taste like December and look like you tried way harder than you did. Make a pan, break it up, and watch your social currency go up without lifting anything heavier than a spatula.
Why You’ll Love This Recipe
 That Disappears in Minutes: The 10-Minute Sweet You’ll “Accidentally” Make Twice")
- Fast and foolproof: You can make this in under 15 minutes, plus cooling time. That’s less than one holiday playlist.
- Looks luxe, costs less: It screams “gourmet gift,” but it’s basically two chocolates and candy canes.
- Customizable: Milk, dark, or white chocolate—your call.
Add crunchy cookies or leave it classic.
- Perfect for gifting: Pack in tins, jars, or little bags. Suddenly you’re “that person” who brings the good stuff.
- Kid-friendly, crowd-friendly: No knives, no baking, no drama. Just joyful snapping and munching.
What Goes Into This Recipe – Ingredients
- Dark chocolate: 12 ounces, chopped or chips (at least 60% cacao for a clean snap).
- White chocolate: 12 ounces, chopped or chips (use real cocoa butter for best texture).
- Peppermint extract: 1/4 teaspoon (optional but potent—go easy).
- Candy canes or peppermint candies: 5–6 standard canes, crushed (about 3/4 cup).
- Neutral oil or cocoa butter: 1 teaspoon (optional; helps with smooth melting).
- Sea salt flakes: A pinch (optional; balances sweetness and makes you feel fancy).
Step-by-Step Instructions
 That Disappears in Minutes: The 10-Minute Sweet You’ll “Accidentally” Make Twice")
- Prep the pan: Line a baking sheet (9×13 size works great) with parchment paper, leaving an overhang for easy lifting.
- Crush the candy: Place candy canes in a zip-top bag and crush with a rolling pin.
Aim for a mix of fine dust and pebble-sized bits. Set aside.
- Melt the dark chocolate: Use a heatproof bowl over a pot of simmering water (double boiler) or microwave in 20–30 second bursts, stirring between. Add a teaspoon oil if you like.
Melt until glossy and smooth.
- Spread the base: Pour dark chocolate onto the lined sheet and spread to about 1/4-inch thickness. Tap the pan gently to level. Chill for 10 minutes—just until set, not rock hard.
- Melt the white chocolate: Same method as the dark.
Stir in peppermint extract—start with 1/8 teaspoon, taste, then add a touch more if needed. White chocolate scorches easily, so keep it gentle.
- Layer it: When the dark layer is set but not brittle, spread the white chocolate over it. Work quickly to avoid melting the bottom layer and creating swirls (unless you’re going for that vibe).
- Top it like it’s hot: Sprinkle crushed peppermint evenly over the white chocolate.
Press lightly so it sticks. Add a pinch of sea salt flakes if using.
- Set and forget: Chill in the fridge for 20–30 minutes until firm. Don’t freeze—it can cause bloom and weird textures.
- Break it up: Lift the bark using the parchment and snap into shards.
Rustic looks better than perfect squares, IMO.
- Serve or store: Keep at cool room temp or in the fridge if your kitchen is warm. Try not to eat half of it while “quality testing.”
Storage Tips
- Room temperature: Store in an airtight container for up to 2 weeks. Keep away from heat and sunlight.
- Refrigerator: Lasts up to 3 weeks.
Separate layers with parchment to prevent sticking and peppermint color bleed.
- Freezer: You can freeze for up to 2 months, but thaw in the fridge to reduce condensation. Texture may be slightly less snappy.
- Gifting tip: If packaging in bags, add a small desiccant pack or a layer of parchment to keep everything crisp.
 That Disappears in Minutes: The 10-Minute Sweet You’ll “Accidentally” Make Twice")
What’s Great About This
- Scales beautifully: Double or triple the batch for parties, bake sales, or last-minute gifts.
- No special tools: If you have a microwave and a sheet pan, you’re in business.
- High ROI flavor: Minimal effort, maximum “wow—did you make this?” reactions.
- Kid-proof assembly: Little hands can sprinkle peppermint and “taste test” responsibly.
What Not to Do
- Don’t overheat the chocolate: Burnt chocolate is bitter and gritty. Melt low and slow, stirring often.
- Don’t use imitation white chips only: If they don’t contain cocoa butter, they may seize or separate.
Choose quality white chocolate whenever possible.
- Don’t skip the set time: Layering on a fully liquid base creates a muddy swirl and messy break.
- Don’t add too much peppermint extract: It goes from festive to toothpaste fast. Measure with respect.
- Don’t store near moisture: Humidity softens the candy and dulls the snap. Airtight containers are your friend.
Different Ways to Make This
- Swirled bark: Skip the set time between layers and swirl dark and white chocolate together with a skewer.
Sprinkle peppermint on top.
- Triple chocolate: Dark base, milk middle, white top. Thin layers set quickly and look bakery-level.
- Cookies & cream peppermint: Stir crushed chocolate sandwich cookies into the white layer, then top with peppermint.
- Nutty crunch: Add toasted chopped almonds or pistachios to the dark layer for texture and color contrast.
- Dairy-free/vegan: Use dairy-free dark and white chocolates with cocoa butter, and check candy cane ingredients. Still fantastic.
- Mocha mint: Stir 1 teaspoon espresso powder into the dark chocolate.
It’s grown-up hot cocoa in bark form.
- Gluten-free gift: Stick to pure chocolate and peppermint and verify labels. Most classic versions are naturally GF.
FAQ
Why did my chocolate bloom (look streaky or dusty)?
Temperature swings or moisture can cause fat or sugar bloom. It’s safe to eat but not as pretty.
Keep your chocolate away from steam while melting, and cool the bark gradually in the fridge—not the freezer.
Can I temper the chocolate for extra shine and snap?
Absolutely. Tempering gives a glassy finish and room-temp stability. If you’re up for it, melt two-thirds of the chocolate gently, then stir in the remaining third off heat until smooth and around 88–90°F for dark and 84–86°F for white.
What if my white chocolate seizes?
If it clumps and goes grainy, a few drops of warm neutral oil can rescue it, but results vary.
Seizing usually means water got in or it overheated. Work slowly and keep utensils bone-dry.
Can I use peppermint oil instead of extract?
Yes, but it’s stronger. Start with 1–2 drops, then taste.
You can always add; you can’t subtract. FYI, some oils can dull chocolate if overused.
How thick should the layers be?
Aim for roughly 1/4 inch total thickness. Too thick and it’s hard to bite; too thin and it shatters aggressively.
Think sturdy, not brick-like.
How do I get clean, even pieces?
For neat squares, use a warmed chef’s knife and cut before it’s fully rock-solid. For that classic rustic look, snap by hand once fully set—no rules, just vibes.
Can I make this ahead for parties?
Yes—peppermint bark is the definition of make-ahead. Prepare up to two weeks in advance and store airtight at cool room temperature or refrigerated if your house runs warm.
In Conclusion
Peppermint bark is the holiday hack that tastes like nostalgia and looks like a gift shop jackpot.
Two chocolates, a hint of mint, and a satisfying snap—done. It’s fast, flexible, and dangerously snackable, whether you’re hosting, gifting, or “quality checking” the corner pieces. Make a batch today, and if your tray mysteriously empties, you’ll know why.
Go on—be the hero with the shiny tin and the best bark on the block.
 That Disappears in Minutes: The 10-Minute Sweet You’ll “Accidentally” Make Twice")
Printable Recipe Card
Want just the essential recipe details without scrolling through the article? Get our printable recipe card with just the ingredients and instructions.