
You want a dessert that looks fancy, tastes decadent, and takes less time than scrolling your For You page? Done. These Easy No-Bake Vegan Chocolate Dessert Cups are the dessert hack you’ll brag about—and your friends will beg for.
No oven, no stress, no weird ingredients that require a treasure map. Just creamy chocolate, nutty crunch, and a silky filling that feels premium without the premium effort. Make them once and you’ll “accidentally” make them every week.
Why This Recipe Works

Three layers, zero cooking, maximum payoff.
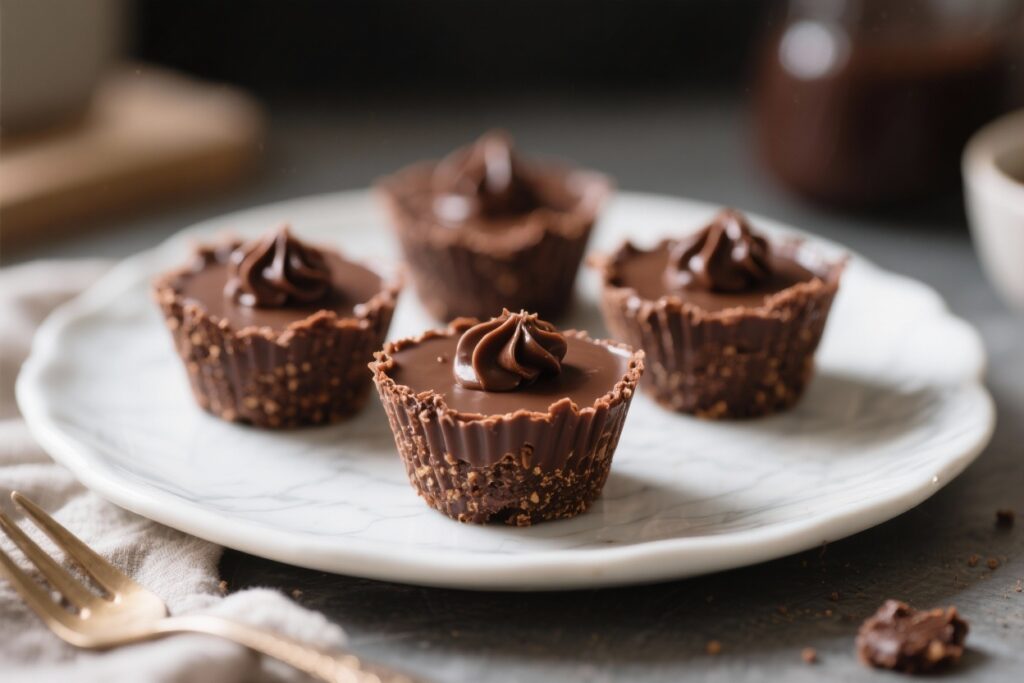
A simple crumb base gives structure and crunch, while the filling is a lush blend of chocolate and nut butter that sets beautifully in the fridge. The dark chocolate top seals the deal—literally—so everything holds together like a pro patisserie treat.
Using plant-based milk and coconut cream keeps things rich without heaviness. Natural sweeteners bring balance without a sugar crash.
And since it’s all no-bake, you control the texture and sweetness at every step. Fast, foolproof, and secretly wholesome? That’s the move.
Shopping List – Ingredients
- For the crust:
- 1 1/2 cups vegan chocolate sandwich cookies or graham crackers, crushed (about 180 g)
- 3 tablespoons melted coconut oil
- 1 tablespoon maple syrup (optional, for extra hold)
- Pinch of sea salt
- For the filling:
- 3/4 cup dairy-free dark chocolate chips or chopped chocolate (about 130 g)
- 1/2 cup full-fat coconut cream
- 1/3 cup creamy peanut butter or almond butter
- 2 tablespoons maple syrup or agave, to taste
- 1 teaspoon vanilla extract
- Pinch of fine sea salt
- For the topping:
- 1/2 cup dairy-free dark chocolate chips (about 90 g)
- 1 teaspoon coconut oil
- Flaky sea salt, crushed nuts, or cacao nibs for garnish
- Tools: 12-cup muffin tin, paper or silicone liners, mixing bowls, microwave or double boiler, spoon
Step-by-Step Instructions

- Prep the pan: Line a 12-cup muffin tin with paper or silicone liners.
This keeps the cups neat and release-friendly.
- Make the crust: In a bowl, combine crushed cookies, melted coconut oil, maple syrup, and a pinch of salt. Mix until it resembles damp sand that clumps when pressed.
- Press it down: Divide the mixture evenly among liners. Press firmly with the back of a spoon to form flat bases.
Pop the tin in the fridge while you make the filling.
- Melt the chocolate: Add chocolate and coconut cream to a microwave-safe bowl. Heat in 20–30 second bursts, stirring between each, until smooth and glossy. Alternatively, use a double boiler.
- Whisk in the good stuff: Stir in peanut butter, maple syrup, vanilla, and salt until fully integrated.
Taste and adjust sweetness.
- Fill ’em up: Spoon the filling onto the chilled crusts. Tap the tin gently to level the tops.
- Chill round one: Refrigerate for 20–30 minutes until the filling is mostly set. This helps the topping spread cleanly.
- Top with chocolate: Melt the topping chocolate with coconut oil until silky.
Spoon 1–2 teaspoons over each cup and tilt to coat evenly.
- Finish with flair: Sprinkle flaky salt, chopped nuts, or cacao nibs over the tops. A little crunch makes you look like a pro.
- Chill round two: Refrigerate 30–45 minutes until completely set. Peel off the liners and serve.
How to Store
- Fridge: Store in an airtight container for up to 5 days.
They stay firm and creamy.
- Freezer: Freeze for up to 2 months. Let sit at room temp 10–15 minutes before eating for truffle-like texture.
- Pack smart: If transporting, keep cold packs in the bag. These are chocolate cups, not lava cakes.

Nutritional Perks
These cups deliver a balanced treat with healthy fats from nut butter and coconut cream, plus antioxidants from dark chocolate.
The optional maple syrup offers a gentler glycemic impact than refined sugar, IMO, especially when paired with fats.
Choose 70%+ dark chocolate for more polyphenols and less sugar. Swap peanut butter for almond or cashew butter if you want a micronutrient boost. It’s dessert, but it’s not a blood-sugar ambush.
Avoid These Mistakes
- Using low-fat coconut milk: It won’t set properly.
Use full-fat coconut cream for a stable, creamy filling.
- Skipping the salt: A pinch wakes up the chocolate. Bland chocolate is a crime.
- Overheating chocolate: Burnt chocolate turns grainy. Heat gently and stir often.
- Thin crust pressure: Press the crust firmly.
Loose crumbs = crumble city.
- Impatience with chilling: If you don’t let layers set, you’ll get swirls and smears. Cute? Maybe.
Clean? Nope.
Variations You Can Try
- Salted Caramel Pretzel: Swap cookie crumbs for crushed pretzels, add a drizzle of vegan caramel between filling and topping, and finish with extra flaky salt.
- Mocha Madness: Whisk 1 teaspoon espresso powder into the filling and sprinkle with coffee beans crushed to dust.
- Cookie Butter Crush: Use speculoos cookies in the crust and replace peanut butter with cookie butter. Dangerous, FYI.
- Hazelnut Truffle: Use hazelnut butter and add chopped toasted hazelnuts to the crust.
Top with shaved chocolate.
- Raspberry Ripple: Swirl 1 teaspoon seedless raspberry jam into each cup before topping with chocolate.
- Protein Boost: Stir 1 scoop of unflavored or chocolate vegan protein into the filling. Add extra coconut cream if it thickens too much.
FAQ
Can I make these gluten-free?
Yes. Use certified gluten-free cookies or oat grahams for the crust.
Everything else is naturally gluten-free.
What if I don’t like coconut?
Use a thick, unsweetened plant-based yogurt or a neutral vegan cream alternative. Start with slightly less than the coconut cream and adjust for texture.
How sweet are these?
They’re mildly sweet with a rich chocolate profile. If you prefer sweeter, add 1–2 extra tablespoons of maple syrup to the filling and use semi-sweet chocolate.
Can I use a different pan?
Absolutely.
Use a mini muffin tin for bite-sized treats (yields 24–30) or a 9×5-inch loaf pan lined with parchment and cut into bars.
Do I have to temper the chocolate topping?
No. The coconut oil helps it set with a soft snap. If you want a glossy, room-temp-stable finish, tempering is an upgrade but not required.
What’s the best nut butter for this?
Creamy peanut butter gives a classic flavor, while almond butter is subtler and cashew butter is ultra-smooth.
Just avoid dry, gritty jars—the smoother, the better.
Can I reduce the fat?
You can sub half the coconut cream with oat milk and add 1 tablespoon cornstarch whisked into the melted mixture. Texture stays creamy but slightly lighter.
Why is my filling grainy?
Likely overheated chocolate or seized from water contact. Gently reheat with a splash of plant milk and whisk until smooth.
How do I keep the crust from crumbling?
Make sure the crumbs are fine, add enough oil to clump, and press firmly.
If still crumbly, mix in another teaspoon of melted coconut oil.
Can I make them nut-free?
Yes. Use seed butter like sunflower or tahini, and choose nut-free cookies. The flavor shifts, but the texture still slaps.
The Bottom Line
These Easy No-Bake Vegan Chocolate Dessert Cups are the kind of dessert that makes you look like you tried—without actually trying.
Crunchy base, silky chocolate center, glossy top, and zero oven drama. Keep the ingredients stocked and you’ve got a “wow” dessert on standby any night of the week.
Fast to make, easy to customize, and friendly to most diets. In short: dessert ROI = high.
Make a batch today, and thank your future self later.

Printable Recipe Card
Want just the essential recipe details without scrolling through the article? Get our printable recipe card with just the ingredients and instructions.