
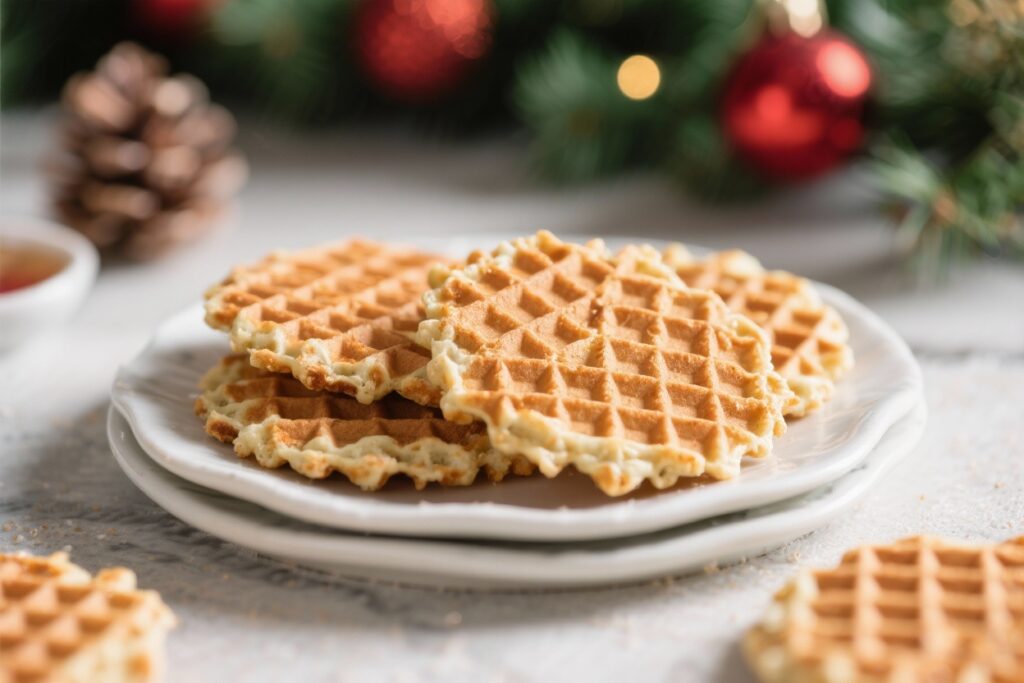
Forget the store-bought tins. You’re about to crank out crisp, lacy pizzelles that taste like Nonna’s… minus the gluten and the lecture. These cookies snap like a dream, look gorgeous on a platter, and disappear faster than you can say “save me one.” If you’ve been burned by soggy GF cookies, this is your redemption arc.
Simple ingredients, fast cook time, and that holiday aroma—anise, vanilla, butter—floating through the house. It’s the one recipe that makes you look like you tried way harder than you did.
What Makes This Recipe Awesome

- Shockingly crisp: Rice flour + cornstarch = that iconic thin, snappy texture.
- Classic flavor, modern twist: Vanilla-anise combo screams holidays. You can swap in lemon or almond and still win.
- Fast batch cooking: Each set takes about a minute in the pizzelle iron.
You’ll have stacks in under 30 minutes.
- No weird gums required: A touch of cornstarch and egg does the structure work—no xanthan gum needed.
- Flexible for dietary needs: Dairy-free? Low sugar? We’ve got options below that still hit the vibe.
What You’ll Need (Ingredients)
- 3 large eggs, room temperature
- 3/4 cup granulated sugar
- 1/2 cup unsalted butter, melted (or coconut oil for dairy-free), cooled slightly
- 1 1/4 cups white rice flour (finely milled)
- 1/4 cup cornstarch (or tapioca starch)
- 1 1/2 teaspoons baking powder
- 1/4 teaspoon fine sea salt
- 1 teaspoon pure vanilla extract
- 1/2 teaspoon anise extract (or 1 teaspoon anise seed, lightly crushed)
- Optional: zest of 1 lemon or orange for a citrus twist
- Optional finish: powdered sugar for dusting
Cooking Instructions

- Preheat the pizzelle iron. You want it hot so the batter sets instantly and crisps up.
Lightly grease if your iron isn’t nonstick.
- Whisk the eggs and sugar. In a medium bowl, whisk for 1–2 minutes until pale and slightly thickened. This adds lightness.
- Add melted butter and extracts. Whisk in the butter (slightly cooled), vanilla, and anise. If using zest, add it now.
- Combine dry ingredients. In a separate bowl, whisk rice flour, cornstarch, baking powder, and salt until evenly mixed.
- Make the batter. Fold the dry into the wet in two additions.
Mix just until smooth and scoopable. It should be thicker than pancake batter but not paste-like. If too thick, add 1–2 teaspoons milk or water.
- Test one pizzelle. Drop about 1 tablespoon batter onto the center of each iron pattern.
Close and cook 45–75 seconds, depending on your iron and desired color. Golden edges = crisp perfection.
- Cool to crisp. Use a fork or offset spatula to transfer to a cooling rack. They’ll firm up within a minute.
Resist snacking. Or don’t.
- Repeat and stack. Continue cooking, adjusting batter size as needed for full coverage. Keep a steady rhythm for consistent color.
- Optional dusting. Once fully cool, dust with powdered sugar.
If storing, dust right before serving to avoid clumping.
Preservation Guide
- Room temperature: Store fully cooled pizzelles in an airtight tin or container with parchment between layers. They stay crisp for 5–7 days.
- Humidity hack: Slip in a small silica gel packet (food-safe) or a few grains of rice in a breathable sachet to fight moisture.
- Freezer: Freeze in a rigid container up to 2 months. Thaw uncovered at room temp to preserve crunch.
- Re-crisp rescue: If they soften, bake on a sheet at 275°F (135°C) for 5–7 minutes, then cool on a rack.

Why This is Good for You
- Gluten-free without compromise: You get classic texture using rice flour and cornstarch—no gums, no grit.
- Portion-friendly: Thin cookies with big flavor satisfy with fewer bites.
Your snack budget stays intact.
- Clean ingredients: No preservatives or mystery oils. Just eggs, butter, flour, and flavor.
- Customizable sweetness: You control the sugar and can reduce by 2 tablespoons without wrecking structure.
Avoid These Mistakes
- Using gritty flour: Coarse rice flour = sandy texture. Use finely milled white rice flour, not brown rice flour (too heavy).
- Overmixing the batter: It toughens the cookies and makes them dense.
Stir until just smooth—then stop.
- Underheating the iron: A lukewarm iron gives pale, floppy pizzelles. Preheat fully; the first one is your test run.
- Too much batter: Overflow city. Start with 1 tablespoon; adjust by 1/2 teaspoon if your iron pattern is larger.
- Stacking while warm: Traps steam and kills crunch.
Cool individually on a rack first, then stack.
- Skipping the salt: A pinch sharpens the flavors. Without it, they taste sweet but flat. Big difference, IMO.
Different Ways to Make This
- Dairy-free: Swap butter for melted refined coconut oil or a neutral dairy-free butter.
Add 1/8 teaspoon extra salt to mimic butter’s flavor.
- Almond pizzelles: Replace anise with 1 teaspoon almond extract. Top warm cookies with a few sliced almonds for flair.
- Citrus-spice: Add 1 teaspoon orange zest and 1/4 teaspoon ground cardamom. It’s holiday elegance without trying too hard.
- Chocolate: Replace 2 tablespoons rice flour with 2 tablespoons cocoa powder.
Add 1–2 tablespoons mini chips if you like chaos.
- Lower sugar: Reduce sugar to 2/3 cup. Texture stays crisp, flavor slightly less caramelized but still excellent.
- Rolled cannoli shells (mini): While hot and pliable, wrap pizzelles around the handle of a wooden spoon. Fill with ricotta cream later.
FYI: work quickly.
FAQ
Do I need a pizzelle iron?
Yes. A waffle iron won’t get them thin or patterned enough. If you must improvise, a krumkake iron works, but timing will vary.
Can I make the batter ahead?
You can refrigerate for up to 24 hours.
Let it sit at room temp for 15 minutes and whisk briefly before cooking. If it thickens, add 1–2 teaspoons milk or water.
What if I don’t like anise?
Use vanilla only, or swap in almond, lemon, or orange extract. The base is neutral and plays well with many flavors.
How do I keep them from sticking?
Lightly grease your iron’s plates before the first batch and every few rounds if needed.
Also, let them cook fully—underdone pizzelles tend to stick.
Can I use a gluten-free all-purpose blend?
Yes, but results vary by brand. Choose a fine blend without bean flours. You may need 1–2 teaspoons extra liquid if the batter seems thick.
Why did my pizzelles turn soft overnight?
Moisture in the air.
Store in a truly airtight container and add a moisture absorber. Re-crisp in the oven for a few minutes and cool on a rack.
Can I frost or dip them?
Absolutely. Dip edges in melted dark chocolate and sprinkle crushed pistachios or peppermint.
Just let the chocolate set fully before storing.
How thin should the batter be?
Scoopable but fluid. Think thicker than cake batter, thinner than cookie dough. It should spread under the iron without oozing everywhere.
The Bottom Line
These Easy Gluten-Free Pizzelles for Holidays deliver the exact crunch and flavor you crave with none of the gluten drama.
The batter is simple, the cook time is fast, and the results look bakery-level—because you are, officially, that person now. Customize the flavors, stack them in pretty tins, and watch them vanish. One bite, and you’ll understand why this recipe earns a permanent December invite.

Printable Recipe Card
Want just the essential recipe details without scrolling through the article? Get our printable recipe card with just the ingredients and instructions.