
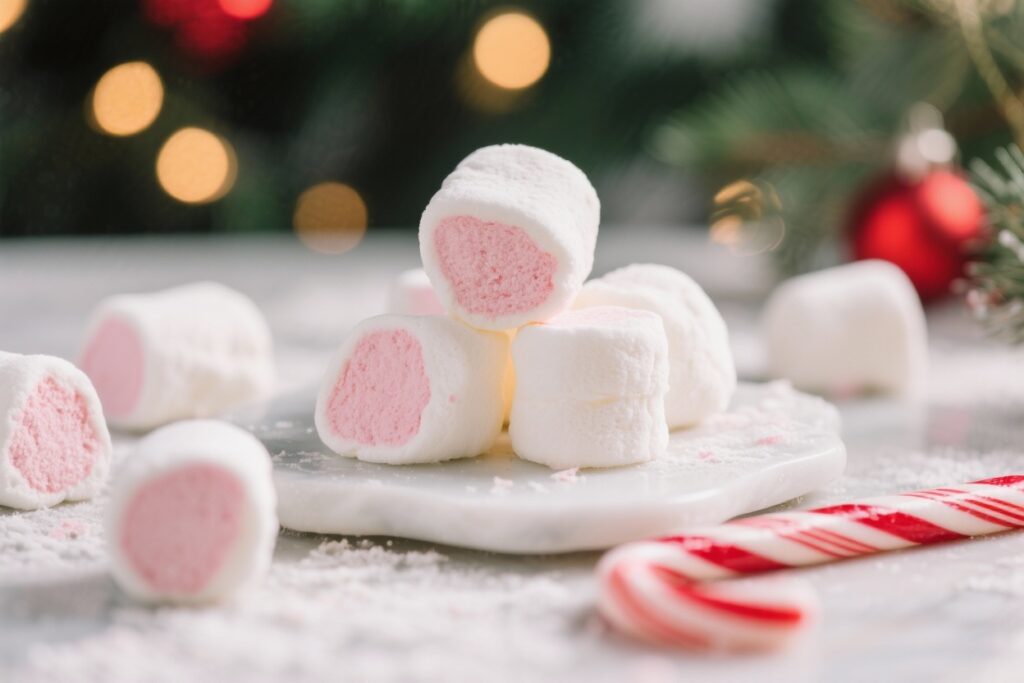
Skip the store-bought bag. You’re about to whip up clouds of candy-cane magic that melt in hot cocoa and wow on dessert boards. These Christmas Candy Cane Marshmallows are fluffy, festive, and ridiculously satisfying to make—like DIY snow, but edible.
The texture? Soft as a whisper. The flavor?
Cool peppermint with a swipe of vanilla. Your only problem will be keeping everyone from “testing” the tray before they set.
What Makes This Special
: Pillow-Soft, Peppermint-Perfect Treats You’ll Want on Repeat")
These marshmallows are peppermint-infused with real candy cane crunch, so you get a soft bite with little pops of holiday joy. They’re homemade, which means no weird additives—just clean, cozy ingredients that hold their shape and toast like a dream.
A swirl of red peppermint ribbons makes them look straight out of a boutique bakery. And they’re absurdly versatile: cocoa toppers, edible gifts, s’mores upgrades, or that “I brought something” contribution that actually gets remembered.
Ingredients
- Gelatin: 3 packets unflavored gelatin (about 21 g total)
- Cold water: 1/2 cup for blooming + 1/2 cup for syrup
- Granulated sugar: 2 cups
- Light corn syrup: 2/3 cup (prevents crystallization)
- Fine sea salt: 1/4 tsp
- Pure vanilla extract: 1 tsp
- Peppermint extract: 1/2–3/4 tsp (to taste)
- Powdered sugar: 1 cup (for dusting)
- Cornstarch: 1/2 cup (for dusting)
- Candy canes: 4–5 standard canes, finely crushed (about 1/2 cup)
- Red food coloring: A few drops or gel swirls (optional for candy cane look)
- Neutral oil or nonstick spray: For pan and tools
- Optional: Melted dark chocolate and extra crushed candy canes for dipping
Step-by-Step Instructions
: Pillow-Soft, Peppermint-Perfect Treats You’ll Want on Repeat")
- Prep the pan. Lightly oil a 9×9-inch pan (or 9×13 for thinner marshmallows). Line with parchment, leaving overhang.
Oil the parchment too. In a small bowl, whisk 1 cup powdered sugar with 1/2 cup cornstarch. Dust the pan generously.
- Bloom the gelatin. Add 1/2 cup cold water to the bowl of a stand mixer.
Sprinkle gelatin over the water. Let it bloom for 10 minutes until spongy. No mixing needed yet.
- Make the syrup. In a saucepan, combine 2 cups sugar, 2/3 cup corn syrup, 1/2 cup water, and 1/4 tsp salt.
Bring to a boil over medium heat, stirring just until sugar dissolves. Clip on a candy thermometer and cook to 240°F (soft-ball stage). Don’t stir once it’s boiling.
- Whip it. Start the mixer on low to break up the gelatin.
Carefully stream the hot syrup down the side of the bowl. Increase to high and whip 8–10 minutes until thick, glossy, and tripled in volume.
- Flavor time. Beat in 1 tsp vanilla and 1/2–3/4 tsp peppermint extract. Start with less peppermint, taste, then add more.
Remember: peppermint gets stronger as it sets, so don’t go overboard.
- Optional swirl. If you want candy cane stripes, add a few red food coloring drops or lines of gel. Pulse the mixer once or twice—or gently fold with a spatula—for a marbled effect. Don’t overmix or the color goes pink all over (still cute, though).
- Pour and top. Scrape the mixture into the prepared pan.
Smooth with an oiled spatula. Sprinkle with finely crushed candy canes for texture and sparkle. Lightly press them in so they stick.
- Let it set. Dust the top with the sugar-cornstarch mix.
Let the pan sit uncovered at room temp for 4–6 hours, or overnight. Humidity is the enemy, FYI.
- Cut cleanly. Flip onto a cutting board dusted with your sugar-cornstarch mix. Peel off parchment.
Oil a sharp knife or pizza wheel, dust with the mix, and cut into squares. Toss each piece in more dusting mix to prevent sticking.
- Optional dunk. Dip edges or halves into melted dark chocolate and finish with extra crushed candy cane. Let set on parchment until firm.
Now they look gift-shop fancy, minus the markup.
Keeping It Fresh
Store marshmallows in an airtight container at room temperature for up to 2 weeks. Add a little extra powdered sugar/cornstarch mix to the container to absorb moisture. Avoid the fridge, which can make them sticky or dense.
If they clump, toss gently in more dusting mix and they’ll behave again.
: Pillow-Soft, Peppermint-Perfect Treats You’ll Want on Repeat")
What’s Great About This
- Texture goals: Fluffy, bouncy, and melt-in-your-cocoa soft.
- Flavor control: Adjust peppermint from a whisper to a winter blast.
- Gift-friendly: Bag with ribbon and a cocoa packet—instant hero status.
- Kid-approved project: Crushing candy canes = free entertainment.
- Budget win: Gourmet results without boutique prices, IMO.
Avoid These Mistakes
- Skipping the thermometer: Guessing the syrup temp leads to sad, weepy marshmallows or rubber bricks. Hit 240°F.
- Under-whipping: If it’s not thick and glossy, it won’t set right. Go the full 8–10 minutes.
- Overdoing peppermint: Too much extract tastes medicinal.
Measure, taste, proceed.
- Not dusting enough: Skimping on the sugar-cornstarch mix = sticky chaos. Be generous.
- High humidity: Humid kitchens make marshmallows tacky. Choose a dry day if possible.
Recipe Variations
- White Chocolate Drizzle: Drizzle set marshmallows with melted white chocolate and sprinkle with candy cane dust.
- Double Mint: Add 1/4 cup finely chopped mint chocolate to the top before setting for a cool-and-creamy surprise.
- Hot Cocoa Cubes: Fold in 2 tbsp sifted cocoa powder during the last minute of whipping, then swirl red for that candy cane look.
- Vanilla Bean Peppermint: Use 1/2 scraped vanilla bean for a luxe speckled vibe.
- Spiked Marshmallows: Add 1–2 tsp peppermint schnapps with the extracts.
Keep it modest or they won’t set properly.
- Gluten-Free Crunch: Use certified gluten-free candy canes if needed; the base is naturally GF.
FAQ
Can I make these without a stand mixer?
Yes, but use a powerful hand mixer and a deep bowl. You’ll be whipping on high for up to 10 minutes, so rotate the bowl and take quick breaks if your arm protests. Stability and volume are key.
What if I don’t have corn syrup?
Use golden syrup or glucose syrup as a substitute.
Honey works in a pinch but adds flavor and can crystallize more easily. The goal is a invert sugar that keeps the texture smooth.
How do I prevent the syrup from crystallizing?
Wipe down pan sides with a damp pastry brush during boiling to dissolve stray sugar crystals. Don’t stir once it boils, and use corn syrup to stabilize.
Also, clean tools = fewer crystals, fewer tears.
Can I color the whole batch red?
Sure. Add gel color during the last minute of whipping and mix thoroughly. For that candy cane aesthetic, a swirl or streaks look more festive than full-on fire-engine red.
Why are my marshmallows sticky after cutting?
They likely need more dusting mix or more set time.
Toss pieces generously in the powdered sugar-cornstarch blend and let them sit a bit. Humidity could also be the culprit, FYI.
Do these toast like regular marshmallows?
Yes, though the candy cane bits may melt quickly. Skewer and toast lightly over low heat or a kitchen torch.
Watch closely—sugar caramelizes fast.
Can I make them ahead for gifts?
Absolutely. Make 3–5 days in advance, store airtight with extra dusting mix, and package the day you gift. Add a cocoa packet and a mini candy cane for instant holiday cheer.
Final Thoughts
These Christmas Candy Cane Marshmallows are the holiday flex that takes minimal effort and scores maximum delight.
They’re fluffy, peppermint-bright, and shamelessly gifty—plus they level up every mug of cocoa. Make a batch, stash a few for you, and watch the rest disappear faster than you can say “one more square.” Your December just got sweeter.
: Pillow-Soft, Peppermint-Perfect Treats You’ll Want on Repeat")
Printable Recipe Card
Want just the essential recipe details without scrolling through the article? Get our printable recipe card with just the ingredients and instructions.