
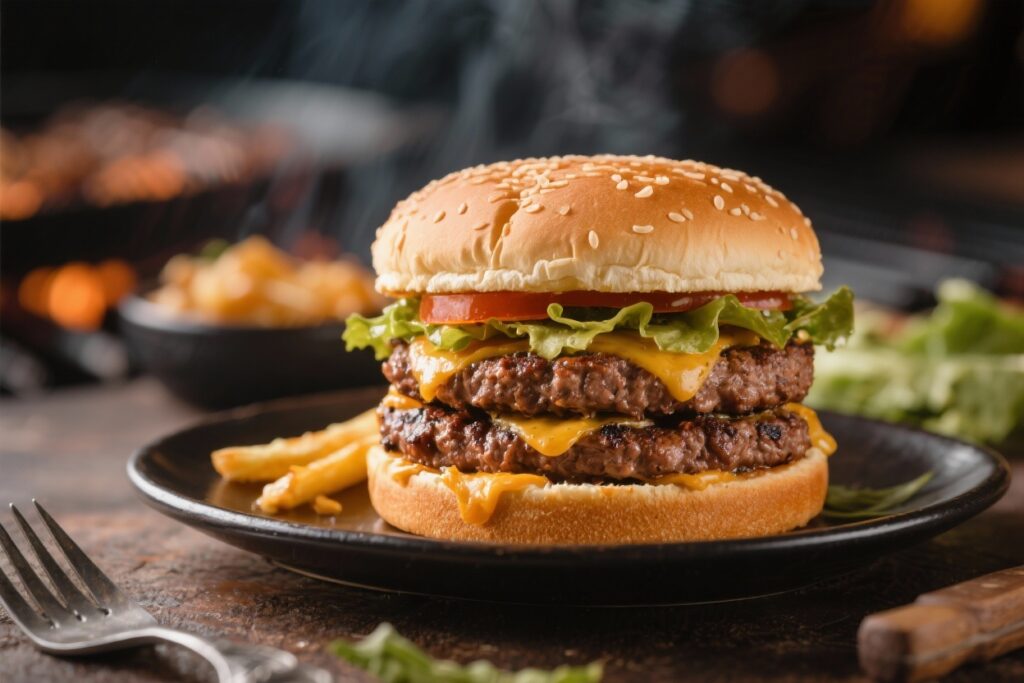
You can spend $18 on a gourmet burger that looks good on Instagram, or you can make one at home that tastes better and actually drips down your wrist. This is that burger. Minimal ingredients, maximal flavor, and a method so simple you’ll wonder why you ever overthought it.
No mystery blends, no chef-y nonsense—just smart technique that gets you a crusty sear, a juicy center, and a burger that steals the show. Ready to make your grill your wingman?
What Makes This Recipe Awesome
 That Turns Backyard Cooks into Legends")
It’s all about the grind. We use 80/20 ground beef because fat equals flavor and moisture. Leaner beef?
That’s how you get dry hockey pucks.
Seasoning that actually works. Salt and pepper—yes, really. We add a touch of Worcestershire and grated onion for insane juiciness without turning the patty into meatloaf.
High-heat sear, gentle finish. You’ll build a crust fast, then bring it to the perfect doneness. No guesswork, no overcooking.
Grill or skillet. This recipe is grill-ready but works beautifully indoors on a cast-iron pan.
Rain won’t stop greatness.
Shopping List – Ingredients
- 2 lb ground beef, 80/20 (chuck is ideal)
- 1 tablespoon Worcestershire sauce
- 2 tablespoons grated yellow onion (squeeze lightly to remove excess liquid)
- 1 ½ teaspoons kosher salt (plus a pinch more for finishing)
- 1 teaspoon freshly ground black pepper
- 4 slices cheese (American, cheddar, or pepper jack)
- 4 sturdy burger buns (brioche, potato, or sesame)
- 2 tablespoons unsalted butter (for toasting buns)
- Optional add-ons: dill pickle chips, tomato slices, red onion, shredded lettuce
- Sauces: ketchup, mustard, mayo, or a quick “burger sauce” (2 tbsp mayo + 1 tsp ketchup + 1 tsp pickle relish + dash hot sauce)
Instructions
 That Turns Backyard Cooks into Legends")
- Preheat the heat source. For a grill: heat to medium-high (425–450°F). For a cast-iron skillet: heat over medium-high until it just begins to smoke. You want hot metal, not guesswork.
- Mix with restraint. In a bowl, gently combine the ground beef, Worcestershire, grated onion, salt, and pepper with your fingertips.
Stop as soon as it looks evenly distributed. Overmixing = dense patties.
- Form the patties. Divide into 4 equal portions (about 8 oz each). Press into ¾-inch thick discs.
Make a shallow thumbprint in the center of each to prevent doming.
- Season the exterior. Lightly sprinkle the outside of each patty with a pinch of salt and pepper right before cooking. Exterior seasoning helps the crust pop.
- Toast the buns. Melt butter on the grill or skillet and toast buns cut-side down until golden. Pull them off to a plate so they don’t over-toast while you cook the patties.
- Sear the burgers. Place patties on the hot grill or skillet.
Don’t press them. Cook 3–4 minutes until the bottom develops a dark, crusty sear and the edges look cooked.
- Flip once. Flip and cook another 2–4 minutes, depending on doneness. For medium-rare: pull at 130–135°F; medium: 140–145°F; medium-well: 150–155°F.
Use a thermometer if you want zero stress (IMO, best move).
- Cheese it right. Add cheese in the last 60 seconds. Cover the grill or tent the skillet with a lid to melt it into a glorious blanket.
- Rest briefly. Transfer to a plate and rest 2–3 minutes. This keeps the juices where they belong: inside the burger.
- Assemble with intention. Bottom bun, sauce, lettuce (it acts as a juice barrier), patty, pickles, onion, tomato, then top bun with a swipe of sauce.
Bite. Grin.
Keeping It Fresh
Short-term: Cooked patties keep in the fridge for 3 days in an airtight container. Reheat gently in a covered skillet over low heat with a splash of water for steam.
Freeze like a pro: Form raw patties, place on a sheet pan, and freeze until firm.
Wrap individually, store up to 3 months. Cook from frozen over slightly lower heat; add 2–3 extra minutes per side.
Prep-ahead: Form patties and refrigerate up to 24 hours. Salt the exterior right before cooking to avoid drawing out moisture.
 That Turns Backyard Cooks into Legends")
Benefits of This Recipe
- Consistent juiciness: 80/20 beef, minimal mixing, and a single flip keep the burger tender.
- Fast and flexible: From fridge to plate in under 30 minutes, grill or skillet.
- Budget-friendly gourmet: You control quality without paying restaurant markups.
FYI, better beef beats gimmicks every time.
- Customizable foundation: The base is simple so your toppings can go classic or wild without clashing.
Avoid These Mistakes
- Overmixing the meat: Treat it like a soufflé, not a stress ball. Overworking compacts the proteins and kills tenderness.
- Cold patties on a cold pan: Meat needs a ripping-hot surface for that Maillard crust. Heat first, then cook.
- Smashing after the flip: If you’re not making smash burgers, don’t press.
That’s your juice escaping.
- Skipping the rest: Those 2 minutes of resting keep the burger juicy. Don’t be impatient—OK, be impatient, but wait anyway.
- Wet toppings under the patty: Tomatoes and pickles on the bottom sog up the bun. Put lettuce or sauce barrier first.
Mix It Up
- Caramelized onion jam: Slow-cooked onions with a splash of balsamic make a sweet-savory topper that slaps.
- Heat wave: Add chopped pickled jalapeños to the patty mix or use pepper jack + chipotle mayo.
- Umami boost: Mix in 1 teaspoon soy sauce and 1 teaspoon Dijon for a deeper, savory profile.
- Bacon blueprint: Crisp bacon on top or render bacon in the skillet, then cook the patties in that liquid gold.
- Fancy cheese move: Try blue cheese crumbles under the melted cheddar.
Sounds extra, tastes epic.
- Herb garden: Fold in finely chopped chives or parsley for a fresh, bright finish.
FAQ
Can I use lean beef?
You can, but expect a drier burger. If you must, add 1 tablespoon olive oil per pound of meat or mix in finely chopped bacon to help with moisture and flavor.
What if I don’t have Worcestershire sauce?
Soy sauce or a splash of fish sauce works in a pinch. They add umami without changing the burger into something weird.
How do I know when to flip?
Look for a browned edge creeping up the sides and easy release from the grill or pan.
If it sticks, it’s not ready. Patience earns crust.
Should I salt the meat in advance?
Salt draws out moisture and can tighten the texture if mixed in too early. Season the exterior right before cooking, and keep interior salt modest.
Can I make smash burgers with this?
Yes—use 3–4 oz balls of 80/20 beef on a ripping-hot skillet.
Smash immediately with parchment and a heavy press, cook 60–90 seconds, flip, cheese, and finish. Different style, same great flavor.
What’s the best cheese for melting?
American melts the smoothest; cheddar adds bite; pepper jack brings heat. Swiss is great if you’re going mushroom-swiss vibes.
Pick your fighter.
How do I keep the bun from getting soggy?
Toast it, add a thin layer of sauce, and place lettuce under the patty. The sauce and greens act like a moisture shield—tiny hack, big upgrade.
Is medium-rare safe?
For ground beef, the USDA recommends 160°F (medium-well). Many people cook to lower temps for juiciness, but that’s a personal risk decision.
Use high-quality beef and handle it safely.
Can I cook these in the oven?
Yes—sear in a hot skillet first, then finish in a 400°F oven for 4–6 minutes to your target temp. This keeps the crust while controlling doneness.
What if my burgers puff up?
That’s why the thumbprint exists. A shallow indentation in the center keeps the patty flat as it cooks.
No more burger UFOs.
The Bottom Line
This burger nails the trifecta: juicy, simple, and grill-ready. With smart seasoning, high heat, and a little discipline, you’ll turn basic beef into a top-tier, crowd-stopping sandwich. It’s the kind of recipe you memorize, not just bookmark—because once you taste it, you won’t settle for average again.
Now fire up the heat and make your future self proud, yeah?
 That Turns Backyard Cooks into Legends")
Printable Recipe Card
Want just the essential recipe details without scrolling through the article? Get our printable recipe card with just the ingredients and instructions.