
You’ve got leftover apple crisp sitting in the fridge looking like a mushy afterthought? Good. You’re one step away from a dessert that looks bakery-level and tastes like fall won the lottery.
These Leftover Apple Crisp Cups are fast, crunchy, warm, and portion-controlled—aka dessert you can brag about. No mixer, no stress, no extra dishes beyond a muffin pan and a spoon. If you can scoop, press, and reheat, you can win dessert tonight.
Why This Recipe Works
")
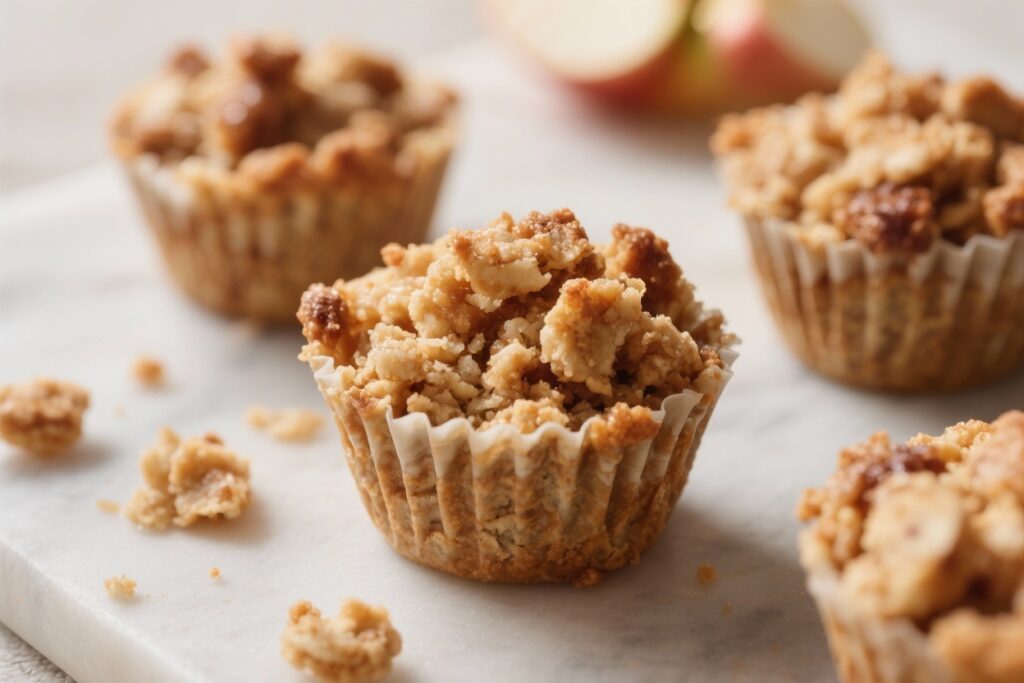
Taking leftover apple crisp and turning it into individual cups fixes the biggest problem: soggy topping.
By pressing the crisp into a muffin tin and baking for a few minutes, you re-crisp the crumble and intensify the flavors. The cup shape traps steam from the apples while the edges stay crunchy—best of both worlds.
It’s also attention-efficient. You’re not making a new dessert; you’re upcycling a good one into something cuter, crunchier, and hand-held.
The structure means every bite hits that ideal ratio: caramelized apples, toasty oat topping, and just enough butter. And yes, it plays perfectly with ice cream.
What Goes Into This Recipe – Ingredients
- Leftover apple crisp (about 3–4 cups), chilled or room temperature
- Unsalted butter (1–2 tablespoons), melted—optional, for extra crisp edges
- Additional oats or granola (1/2 cup), optional for topping refresh
- Brown sugar (1–2 tablespoons), optional if your crisp isn’t sweet enough
- Ground cinnamon (1/2 teaspoon), optional for aroma boost
- Pinch of salt to balance sweetness
- Neutral oil or nonstick spray for the muffin tin
- Optional add-ons: chopped nuts (pecans/walnuts), mini chocolate chips, a drizzle of caramel, or a splash of bourbon (for the adults, obviously)
- To serve: vanilla ice cream, Greek yogurt, or whipped cream
Let’s Get Cooking – Instructions
")
- Preheat and prep: Heat oven to 375°F (190°C). Lightly grease a standard muffin tin with oil or nonstick spray.
- Refresh the crisp: If your topping looks tired, mix in a handful of oats or granola, a pinch of salt, and a bit of brown sugar.
Add melted butter if you want extra crunch. Stir gently so you don’t crush everything into paste.
- Build the base: Spoon 2–3 tablespoons of the apple filling into each muffin cup, pressing lightly to compact. Avoid too much syrup; you want moisture, not soup.
- Add the crunch layer: Top each with 1–2 tablespoons of crumble.
Press down slightly so it binds, but keep it craggy for texture.
- Upgrade (optional): Sprinkle chopped nuts, cinnamon, or a few chocolate chips on top. No judgment—live your dessert truth.
- Bake: Pop into the oven for 10–14 minutes, until the edges are deeply golden and sizzling. If your crisp was cold, lean toward the longer end.
- Cool briefly: Let cups cool in the pan for 5–10 minutes so they set.
Use a butter knife to gently loosen the edges, then lift out with a spoon.
- Serve: Enjoy warm with a scoop of vanilla ice cream or a dollop of Greek yogurt. Drizzle with caramel if you’re feeling extra.
Storage Instructions
- Fridge: Store cups in an airtight container for 3–4 days. Reheat at 350°F for 6–8 minutes to revive crunch, or microwave for 20–30 seconds if you’re impatient (crunch suffers, FYI).
- Freezer: Freeze on a tray until solid, then bag for up to 2 months.
Reheat from frozen at 350°F for 12–15 minutes.
- Make-ahead tip: Assemble in the muffin tin, cover, and refrigerate up to 24 hours. Bake right before serving.
")
Health Benefits
Apple crisp isn’t a salad, but it’s not a villain either. Apples bring fiber, vitamin C, and polyphenols—great for digestion and antioxidant support.
Oats add beta-glucan fiber, which supports heart health and helps with steady energy.
If you serve with Greek yogurt instead of ice cream, you’ll add protein and probiotics. Use nuts for healthy fats and extra satiety. It’s dessert with benefits—reasonable ones, IMO.
Pitfalls to Watch Out For
- Too wet = soggy cups: If your apple filling is very juicy, drain off a little liquid or stir in extra oats before assembling.
- Overpacking the tin: Don’t cram.
Overfilling leads to collapse and sticking. Aim for 3/4 full.
- Skipping the cool-down: Taking them out too fast can cause breakage. Let them set in the pan briefly.
- Uneven heating: Rotate the pan halfway through if your oven has hot spots.
Crispy edges are the goal.
- Forgetting the salt: A tiny pinch wakes up the sweetness and the spice. It matters.
Different Ways to Make This
- Air fryer method: 350°F for 6–9 minutes. Great for small batches and speedy crisping.
- Phyllo or puff pastry base: Press a square into each muffin cup, add apple filling, top with crumble, and bake.
You get flaky, buttery layers—dangerously good.
- Gluten-free: Use gluten-free oats and ensure your original crisp was GF-friendly. Sub almond flour in the crumble if needed.
- Vegan: Swap butter for coconut oil or vegan butter. Serve with coconut whip or dairy-free ice cream.
- Protein boost: Mix a spoonful of vanilla protein powder into the crumble refresh and add a little melted butter to bind.
- Breakfast edition: Serve with unsweetened Greek yogurt and a drizzle of honey.
Call it “meal prep” and feel virtuous.
FAQ
Can I make these without a muffin tin?
Yes. Use ramekins or a mini cast-iron skillet. You can also shape freeform mounds on a parchment-lined tray, but they’ll be more rustic and less portable.
What if my leftover crisp is super dry?
Stir in a splash of apple juice, a teaspoon of melted butter, or a drizzle of maple syrup before assembling.
You want moist, not mushy.
How do I prevent sticking?
Grease the tin well, especially the sides. Let the cups cool for 5–10 minutes, then run a thin knife around the edges before lifting out.
Can I use other fruit crisps?
Absolutely. Peach, pear, cherry, or mixed berry all work.
Adjust sweetness and add a bit of cornstarch if the filling seems extra juicy.
Do I need to rebake if my crisp was just made?
If it’s still warm and crunchy, you can assemble and broil for 2–3 minutes to set the tops. Otherwise, a short bake re-crisps and improves structure.
What’s the best topping for serving?
Classic vanilla ice cream wins. For lighter vibes, go with vanilla Greek yogurt or a small spoon of whipped cream.
A pinch of flaky salt on top is a power move.
Can I make these lower sugar?
Yes. Skip extra brown sugar, use unsweetened yogurt, and rely on the apples’ natural sweetness. A little cinnamon and vanilla extract can enhance perceived sweetness without more sugar.
The Bottom Line
These Leftover Apple Crisp Cups transform yesterday’s dessert into today’s quick showstopper.
They’re crispy, cozy, and ridiculously easy, with minimal ingredients and maximum payoff. Whether you’re feeding a crowd or treating yourself, this is the hack that makes leftovers feel first-class. Fast, smart, delicious—what else are we asking for?
")
Printable Recipe Card
Want just the essential recipe details without scrolling through the article? Get our printable recipe card with just the ingredients and instructions.